
Help center Track your money
Log spending, income and savings
Log purchases, paychecks and money moved to savings, set up repeating bills and find any transaction.
Your plan is what you expect. Transactions are what actually happened. Log them as you go and Home shows how the month is really going.
Add a transaction
- On a computer, choose Add transaction at the top of the menu. On a phone, tap the green + button on Home or Transactions.
- Choose what it is:
- Spent: money you spent, in a category.
- Income: money that came in, like a paycheck, a client payment or a bonus. (What you expect to earn is set in My Plan as your income.)
- Saved: money you moved to a savings goal.
- Enter the amount, pick the category, income source or goal, and check the date.
- Add a note if you like (the store, what it was for).
- Choose Save.
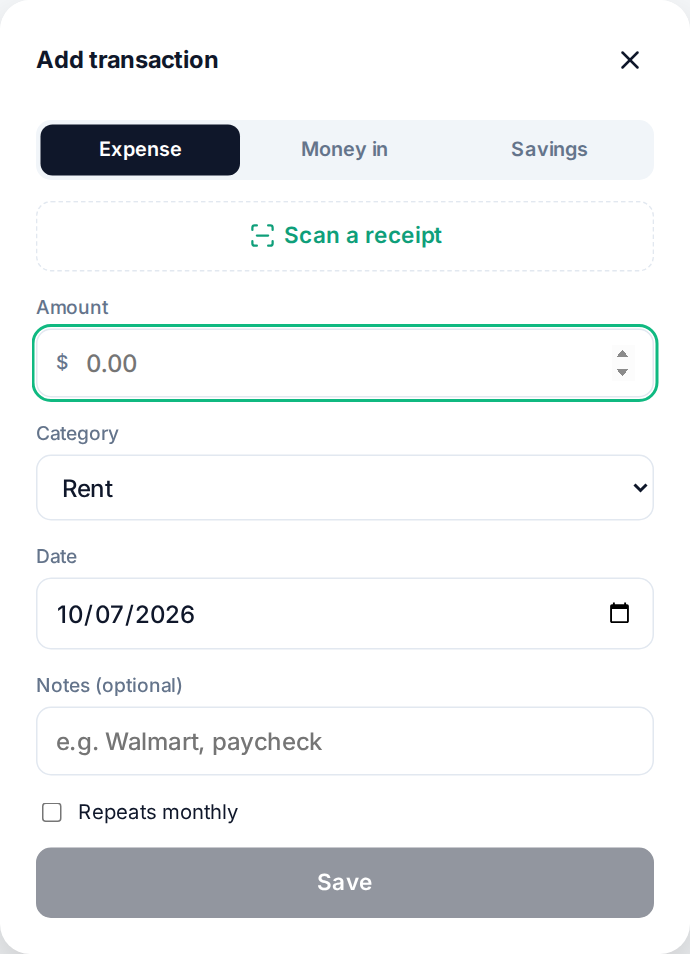
If the category you need isn’t there, choose + New category… in the list to make one without leaving the window. For a category split into items (like Subscriptions), you can pick the item too.
Bills that repeat
For something that repeats, like rent, a phone bill, tithe or a paycheck, choose how often under Repeats before you save: every week, every 2 weeks, every month or every year. You can also open a transaction you logged before and make it repeat from then.
Each time it comes due, it waits on Home under To confirm. Press Confirm to log it (change the amount first if this one was different), Skip if it didn’t happen, or Confirm all. Nothing is logged without you seeing it, so you never type the same bill twice and never miss one that changed.
Repeating transactions are listed under Repeating on the Transactions page, with when each comes up next. To stop one, choose the stop button next to it. Entries already logged stay.
See and change your transactions
Transactions lists everything for the month you choose, with what you spent, earned and saved at the top. Choose Filter to see only what you Spent, your Income or what you Saved (and one account, or one person); each filter that's on shows as a chip you can tap to clear. Search all months finds a transaction in any month.
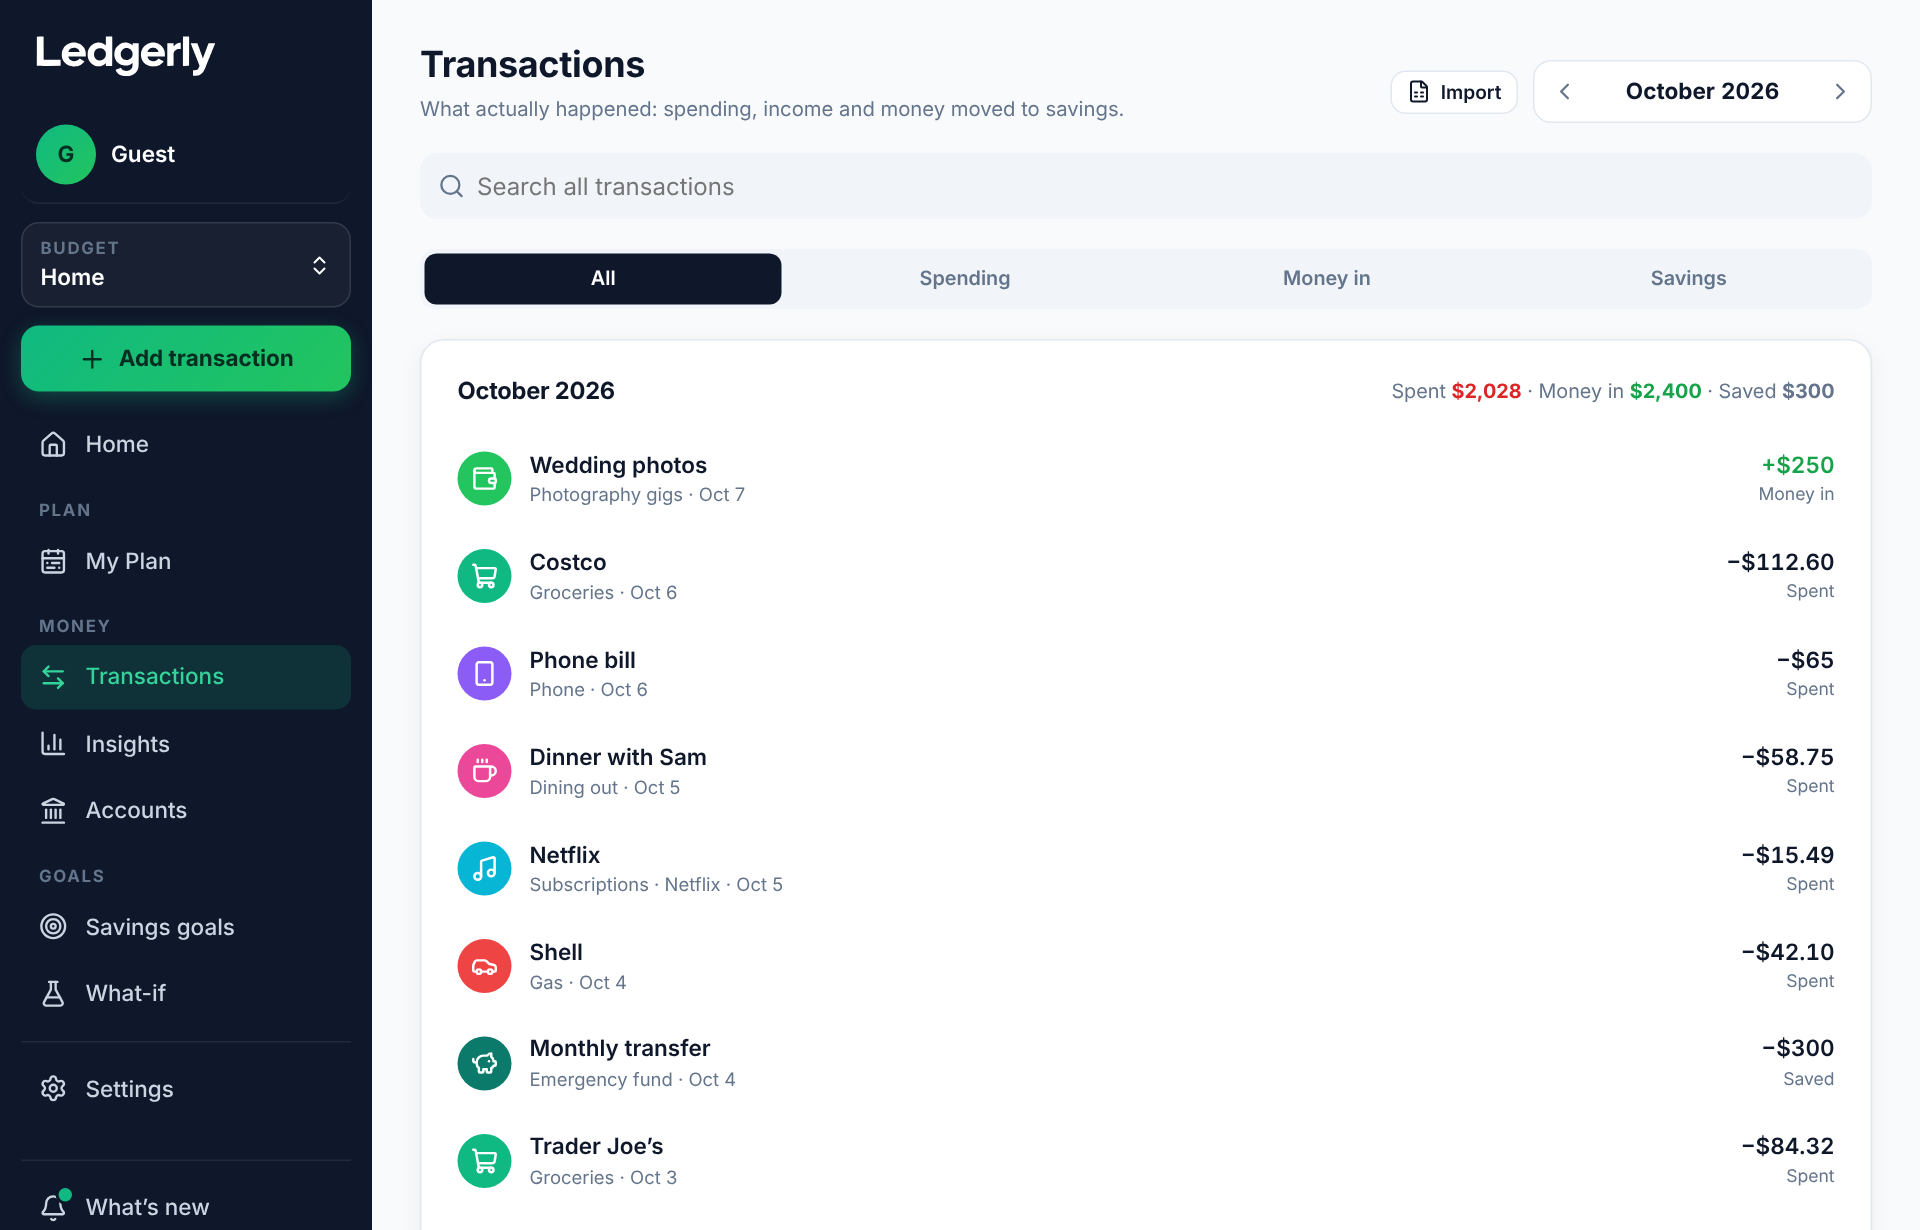
Select a transaction to change it, or to delete it with Delete transaction, then Delete to confirm (deleting can’t be undone). When you log money in, the amount starts as your usual paycheck, ready to change.
Import a bank or card statement
Download your statement from your bank or card’s website as CSV, OFX or QFX (Quicken), or use a spreadsheet you’ve kept, and choose Import a statement at the top of the Transactions page (on a phone: the green +, then Import a statement). The file is read on your device. See Import from a spreadsheet.
- Columns once per bank: check which column is the date, description and amount the first time. Ledgerly remembers it for that layout, so the next file from the same bank is read the same way.
- Categories filled in: each purchase goes in the category you used for that store before, or one that fits the kind of store (Shell: your car category). Change any of them.
- Duplicates: ones already in your budget are left out. Ones that may be (the same amount within 3 days of something you logged) start unticked, marked Maybe already logged; tick any that aren’t.
- Money moved between accounts (to a brokerage like Robinhood, a credit card payment, "transfer to savings") comes in as a Transfer, not spending or income: to your account it names, or to an account outside Ledgerly by name. Change any line to Spending, Income or Transfer before importing.
- Nothing is added until you press Import.
Ledgerly never asks for your bank login: you download the statement and choose what to bring in (or, with Premium, link your bank through Plaid in Settings: what it sends waits at the top of Transactions for you to check; Save all as suggested saves the purchases that have a category, your paychecks, transfers and balances in one tap, and leaves the rest for you to choose).
Charges that repeat
Under Repeating on the Transactions page, Ledgerly lists charges that look like they repeat (the same store at about the same amount every week, 2 weeks, month or year), with what each costs a month and a year. Press Make it repeating to set one up; each time it comes due it waits on Home to be confirmed.
Scan a receipt instead
In the Add transaction window, choose Scan a receipt to read the store, date and total from a photo. See Scan a receipt.